Thursday, February 25, 2010

Our Venue.

We have changed our venues. Having a cocktail reception at Zac's family home was going to be too much stress, so we reviewed our decision making paradigms.

The original logic being: we wanted
  • A beautiful space
  • That didn't charge for food
  • And was sheltered in case of rain.
Good luck with that in Perth. Unless you want a dingy town hall, but we chose a church instead.

New logic:
  • We can go somewhere that charges for food
  • Because we now require it.
Brilliant.

So for a week there we were in limbo. We canceled the church and the caterers. Officially getting married no-where, scary.

But we ended up finding a great venue that fits exactly what we wanted...

Let me introduce you to The Old Brewery.

A bit of a regular on the Perth Wedding Scene, but for good reason. It is a beautiful, old building that is in good repair (rare in Perth), separate function area, it has in-house caterers (award winning!) and a view to knock your socks off.

We decided that we are going to have both the ceremony and our reception at The Old Brewery, dividing up the space in the function area. The ceremony will be in the glass-walled foyer area, the reception further back into the room. We will be going straight from the ceremony into lunch.

The only down side is that because of this new transition between ceremony and reception is that we had to cut our guest list. It was the lesser of two evils - invite more people to the ceremony and be rude by asking them to leave when a whole bunch of people would obviously stay around for lunch or be rude by inviting less people than we did to our engagement party.

The latter option won out.

Ladies and Gentlemen, The Old Brewery:


all photos from The Old Brewery

Wednesday, February 24, 2010

Who could resist.

Last night Zachary and I grabbed some floor time. I mentioned that I was thinking of only wearing one band on my left hand, perhaps putting the engagement ring on the right hand. I'm just not a big fan of two rings, looks odd to me.

Anyway.

Monsieur got irritated and insisted that I wear two rings on the same hand, same finger. I asked "Why?"


"Because they kiss each other."


Who can resist an answer like that? Totally illogical and sweet.

Saturday, February 20, 2010

Cyclone Pt 2

Well, the hotel sounds like it is still standing. The manager replied to our email and had to torture us by mentioning that it was sunny outside on the lagoon and some guests were kayaking.

photo from Lonely Planet Images

Nice to know. Thanks. Wish we were there already!

Monday, February 15, 2010

Cyclone.

We heard this week that Aitutaki was hit by Cyclone Pat. Direct hit and 80-90% of houses have been damaged. I always knew the lagoon was in a top spot for cyclones so I've been checking in during cyclone season and I was so sad to see the damage. Apparently the elderly people on the islands said they can't remember a worse storm.

We don't even know if our hotel is okay, we will probably call them this week.

I'm not even worried about the resorts at the moment, I am just hoping that the people are going to be ok (no one died - thank God!) and that their livelihoods would get back on track quickly.

Here are some pictures from the New Zealand Herald.

Here is a video report from TV NZ.

Monday, February 8, 2010

Winter Romance in the City.

We promise to tell you all about our new venue and our new ideas very soon! Until then, these images are inspiring us... you will have to content yourselves with this little mood board I made up:

top left: Elizabeth Toll via This is Glamorous top row: by Michele M. Waite via 100 Layer Cake,
Mucca Design via Black Eiffel middle row: Snippet and Ink, Joachim Bandeau Watercolour

Sunday, February 7, 2010

Lights.

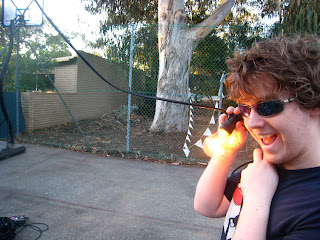
This is last DIY post from our engagement party. But isn't really DIY, more like DIT (do it together). We got our mate George to come in and hang some lights. He is such a character!

Here are some photos from our set up the day before. First they hung tension wire across the court, then cable-tied the light strings to the wire, then added the globes as they went.

Boys + lights + ladders = Deadly combination.

I stayed out of their way for obvious reasons.

untangling the light strings.

resident fiance.

resident rocket scientist + bridesman.

tennis court: on it's way to being transformed.

Saturday, February 6, 2010

Flowers.

Early on Friday morning (i.e. 5:45am) Mum and I woke up. We drove for 30 minutes to Everbloom in Leederville to get some flowers. Good on you, Everbloom, for selling to the public!

We picked up everything that we could see that was textured, yellow, white and grey.

A few minutes later we walked out with:
  • White spider chrysanthemums
  • Dusty Miller foliage
  • Yellow roses, I believe they were called "Tweety"
  • Yellow daisys, but NOT gerberas. Hate gerberas. They don't even deserve a capital letter.

We also dropped by Dad's church on the way home and happens to pick up some roses from the rose garden that had 'fallen off the bushes in the wind'. Very strong Easterly that morning. Very strong. Hrmm, cough cough.


I also picked some grey Wattle foliage and some Branches With Really Big Grey Leaves that I don't know the name of from our garden.


Then it all went in the sink:


Then I combined:
1x Wattle branch
1x Tweety rose
1x Spider Mum
1x Daisy
3+ Dusty Miller

and put them in a glass jar, most of which were borrowed from my good friend Kirsty. Thanks Kirsty!

The white garden roses, courtesy of the Easterly Wind (aka, mother's garden scissors) went into ikea vases, courtesy of Kirsty, and graced a table along the path.

I did other arrangements, but I don't have photos of them.. boo! Thank goodness we will have a photographer at the wedding!

If anyone has any photos - feel free to email them to me :)

Thursday, February 4, 2010

Benches.

That's right, we made benches for 90 people to sit on. We're crazy!

The biggest time waster with these, was:
  • deciding to do them
  • waiting on the timber
Ok, so we ordered 1800mm lengths of treated pine for the top of the benches. We also ordered sleepers to make the legs. We got a good price because one of my uncles owns Pine Timber Products. Shout out to you, Uncle John!

I don't have too many photos of this process, I was inside ironing and sewing like a housewife! I'm probably too delicate to get my hands rough anyway, so just as well I had another project to work on ;)

First, we started by cutting the sleepers into legs. Mum, Dad and Zac did this with one of Mum's electric saws. I think this one was a mother's day gift, or a birthday present? My mum is so handy!


Next, the boys drilled pilot holes on the sleepers legs. This is so that when we screwed the tops to the legs it would be easier to get them in the right place.


What happened next is something I don't have pictures of - sorry! Using a metal template that was made by our handyman-friend Rod, we drilled more pilot holes. This time into the top 'seat' part of the benches. Four holes, two in each end.. exactly where the legs would go, exactly the same width apart as the pilot holes on the legs.

Then Aaron and Dad used a 'spade' drill bit to make a wide hole on top of the pilot hole (you can see what I mean a couple of photos down). This meant that when we started screwing in the screws, they would sit flush with the bench, not above. No one likes sitting on a lumpy bench!

The only photo I have was of the aftermath of the spade bit:

What happened next was simple, but required some grunt. We assembled the legs and seat to create a bench. Dad, Aaron, Zac and even my 8 year old cousin Katie helped out with this. We put a washer in the hollowed out space on the seat, pushed in a screw as far as it would go and used a socket to screw it the rest of the way down. It took a while!


Voila! Bench seats!

26 benches made! Go team O'Neil!

Wednesday, February 3, 2010

Bright lights, big city.


This photo first made the rounds on the wedding blog scene when I first started looking at wedding blogs, a long time before we got officially engaged.

It still inspires me.

New York Public Library

Candles

Ethereal

Beautiful

One of the best best bridal portraits I have seen, despite seeing ~1,000,000

Photograph by Christian Oth


Monday, February 1, 2010

Bunting.

This week I'm going to post some how-to photos from the lead up to our engagement party.
Today's post is about how we made our BUNTING.

I really wanted to make sure people didn't wander off into the bushes, never to return as they walked from the street to our tennis court. Hanging bunting along the path made sure no one disappeared into the Wild Unknown that is our front yard. Plus I think it is so whimsical, festive and sweet!

I used a guide from Joyful Abode to start out. I made a paper template and cut triangles out of the fabric. Mum had some old yellow and white fabric left over from curtains she had made for her bedroom in our old house. I loved the floral and stripe combination - it is pretty and preppy!


I was too lazy to hem them all and I didn't want to make them double-sided (like in the Joyful Abode tutorial), so I cut them with pinking shears to stop the fraying.


**Note. I only decided this AFTER I had already cut 200+ triangles, so I had to re-cut them. Not recommended!

I then ironed the yellow gingham bias tape in half and we began the long process of measuring and pinning 200 triangles onto 75 metres of bias tape. As I ironed I was able to look at photos from the weddings of the ladies in my family - it's fun to think that our photos will soon be on the 'wedding wall' too!
I pinned while Mum sewed. She rocked that sewing machine. We had to unpick several times as the bias tape was quite small in width and sometimes the triangle would slip out as we sewed. If I ever make bunting again, I would get thicker bias tape.

Here is the bunting..looking so sweet wrapped around our trees and obviously saving Steph and Cassie from disaster!All photos by me (except the last one, which was from Cassie - thanks Cassie!)