I found them over 2 years ago in an Op Shop (charity shop) and swore to myself that I would "do something with them" as I forked over the princely sum of $30. Saying "I'll do something with them" is kind of like how I say "Yeah, I'm almost ready......... " as Zac and I race out the door everyday (we carpool). It's usually followed by, "I just need to grab..."
.
.
.
Anyway, back to business. My favourite feature of this little number was her curvy bottom (!), handles and the good joinery-dovetail joints, no glue here!
 |
| The labels read "pants" and "pyjamas", in case you were wondering.... |
2 years later, I gave up my full time job and got stuck into DIYing so that I didn't continually think to myself "Oh gosh, what did I just do?"
Cue: Bunnings
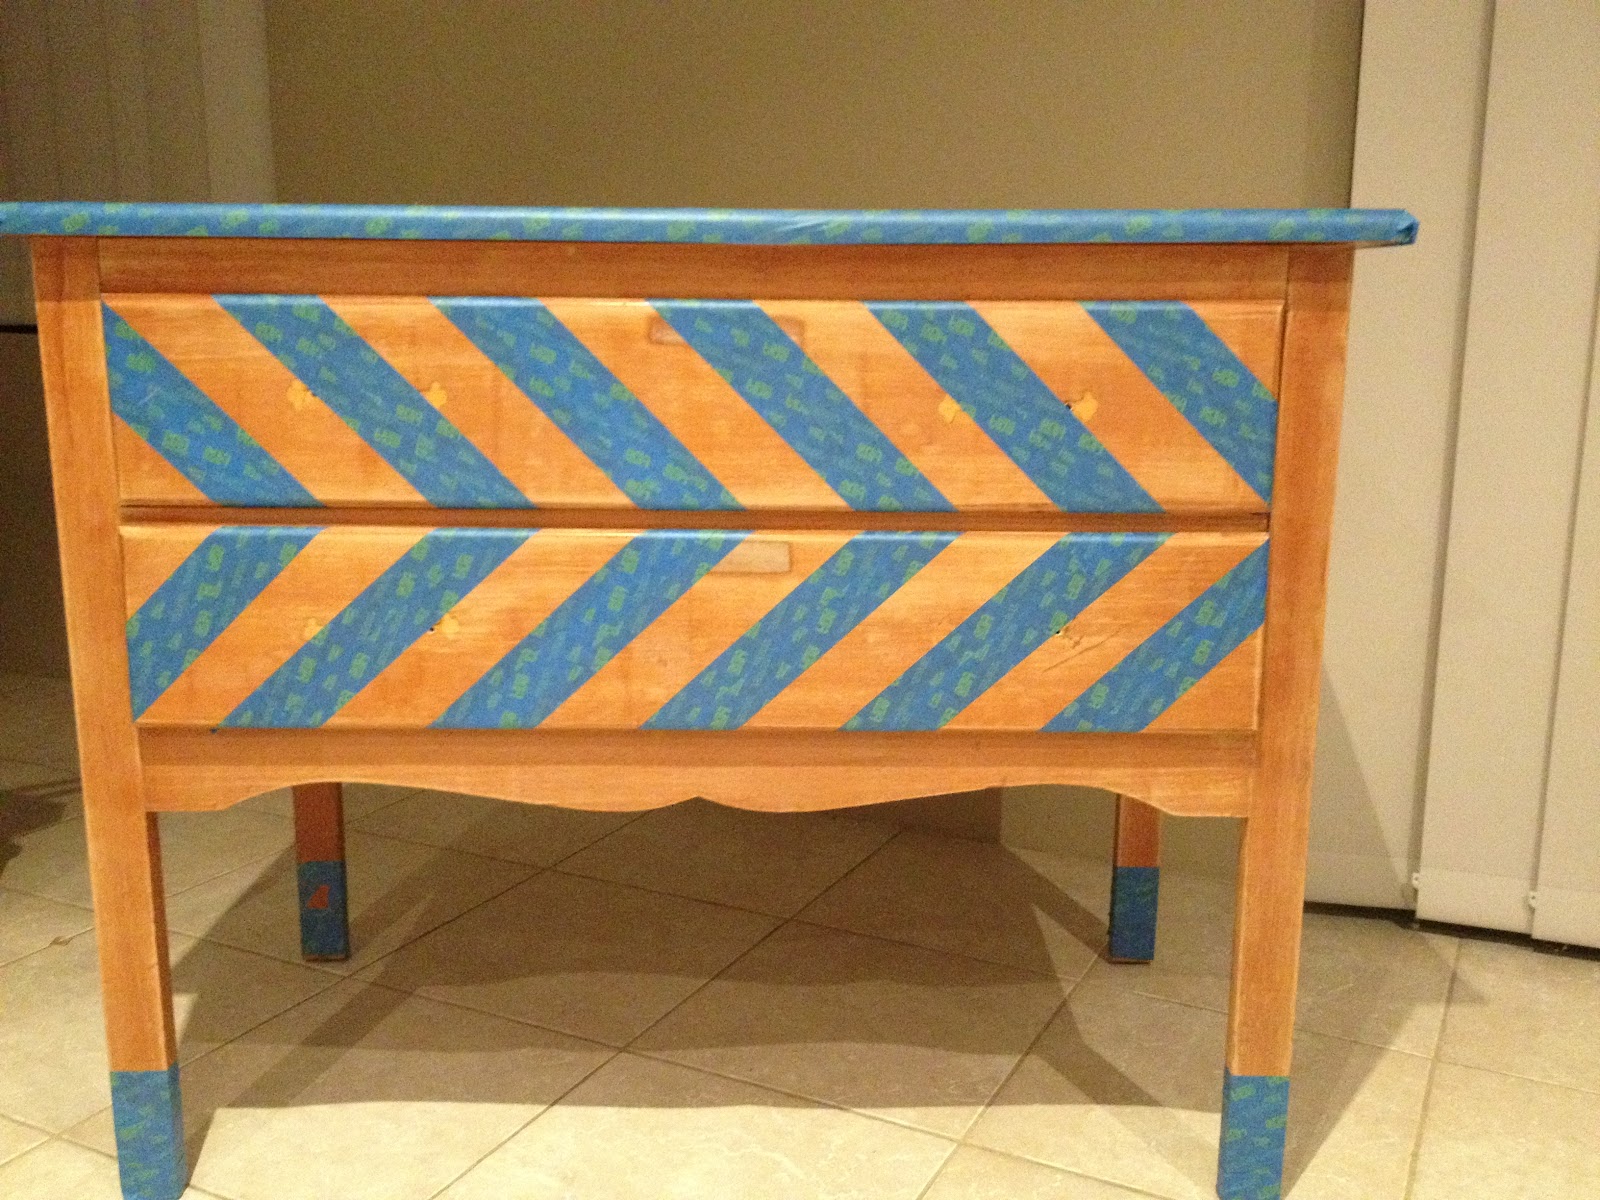
I got stuck into sanding, wiping and masking up my pattern. I had an idea for the front of the drawers (Bold! Geometric! Pattern!) and also a little idea to keep some wood showing on the bottom of each of the legs - like little socks.
I wasn't sure what to do with the top though. Should I paint the whole thing white? Leave it Wooden? Leave an edge? I decided to finish every other piece of masking off and wait to see what it needed.
It definitely needed something, so where it started to curve downward I taped that off to keep the wood showing after I painted it.
Here's a shot of how it looked taped up:
Then I got stuck into painting a layer of primer. Very thin coats that dried really quickly, but I left them for a full day because Autumn was setting in and it wasn't so hot anymore. I wanted that paint D-R-Y.
I broke out my gloss white and painted two thin coats over the primer, waiting a day or two between each coat.
.
Agonising.
.
.
Finally, I got to pull off that tape. It was such a relief to see it come off cleanly and to reveal that smoking hot wood beneath it.
Take a look!

I love everything about her, her daring chevron, her curvy bottom and her sweet socks. The edge around the top pulls the whole look together. I've since reattached her original drawer pulls, I'll put a photo up once I finish the office room.
Cost Breakdown:
Drawers $30
Sanding Sheets $6
Primer $20
White Gloss Paint 1L $40
Painters Tape $5
I didn't even come close to using all of the painter's tape, white gloss paint, primer or sanding sheets, but I have a couple of other projects in mind to turn our office room into a place we actually want to be in. Stay Tuned!
As for the drawers, she is now located in our office room, full of stationery supplies and making me smile every time I walk in. Don't you think her curvy bottom looks much better this colour? You didn't even notice it before.. it's the furniture equivalent of a mini skirt.
Onto the next project!
xoxo Clare